

You can easily compare and combine multiple versions using PowerPoint's Compare feature. This allows you to see the differences between two versions of the same presentation, so you can decide which changes to include in the final version.
To compare two presentations:
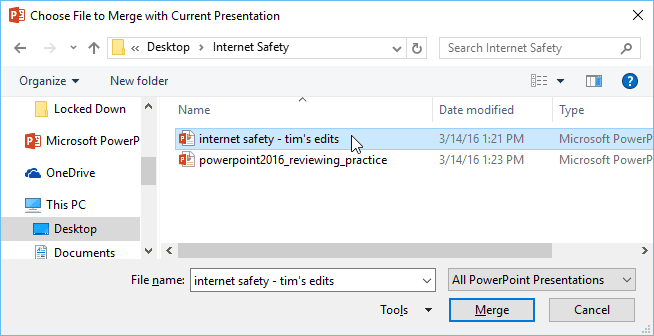
In this example, we'll be comparing two versions of the Internet Safety for Everyone presentation. To follow along, you'll need the original practice presentation (powerpoint2016_reviewing_practice), plus a version that's been slightly altered: internet safety - tim's edits.
Open one version of the presentation you want to compare. In this example, we'll start with powerpoint2016_reviewing_practice.
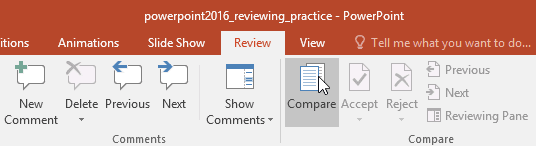
From the Review tab, select the Compare command.
A dialog box will appear. Select the second version of the presentation you want to compare, then click Merge. In this example, we'll choose internet safety - tim's edits.
The Revisions pane will appear, allowing you to compare the two presentations.
Learn how to review changes using the Compare feature.
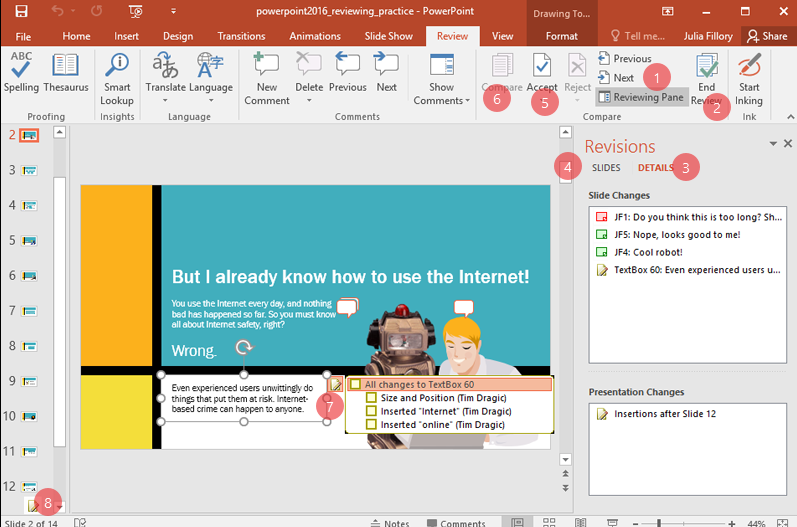
1. Next Change: Use the Next command to view the next change in the presentation. You can also click Previous to go back to the previous one.
3. Reviewing Pane: Details: The Details tab lists every change that has been made to the current slide, as well as any comments. Click a change to see its location on the slide.
4. Revisions Pane: Slides: The Slides tab actually lets you preview the revised slide, so you can see the changes in action (as opposed to the Details tab, which only lists the changes).
5. Accepting Multiple Changes: In addition to reviewing changes individually, you can accept multiple changes at once. Click the Accept drop-down arrow, then choose either Accept All Changes to This Slide or Accept All Changes to the Presentation
6. Compare: To compare your presentation with another version, click the Compare command. Next, locate and select the desired file.
7. Review Changes on the Slide: Click the revisions icon anywhere it appears on a slide to see the changes that were made in that spot. To accept a revision, click the check box beside it. To reject a revision, leave the box unchecked.
8. Review Changes in the Slides Pane: Some changes, like Inserted or Deleted slides, will show up on the Slides pane. Click the revisions icon to see the change, then click the check box if you want to accept it.