

When you turn on Track Changes, every change you make to the document will appear as a colored markup. If you delete text, it won't disappear—instead, the text will be crossed out. If you add text, it will be underlined. This allows you to see edits before making the changes permanent.

Activating this feature will save all changes made by one person it highlights all these with red colour to tell the other one about these changes. after activating this feature, when you change your test, this tool will change the colour of your new added text, or deleted text. Now at the end if you like these changes, then you can ACCEPT otherwise rejecting them will revert your document to original material that was before changes
What is Track Changes?
How you track changes in the new Word.
It has been always a strong link between editor and writer and Microsoft has make this link stronger by introducing Track Change feature. In past it was very necessary to mark the changes with red colour for suggestion and correction. So now editor and writer can use this tool to correct the copy digitally, that a nice step for both of them.
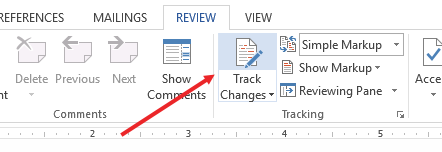
you can activate this feature by;
Go to REVIEW > Click on Track Changes as show in above picture. now this tool has started its working. every change will turned to red colour.
When one has completed his changes, now other will review those changes, but how to accept all these changes/how to turn back the red colour to black for printing.
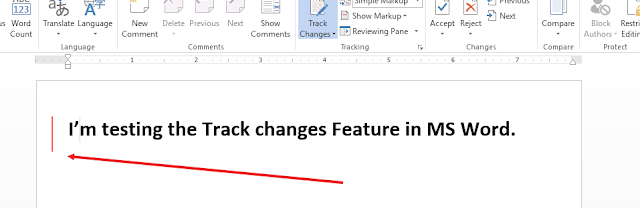
Example with picture:
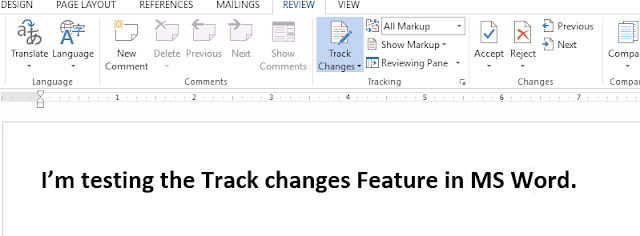
One man wrote this text "I’m testing Track change Feature."
Other man made changed to "I’m testing the Track changes Feature in MS Word."
How MS word will show these changes, see below

Reviewing changes
Tracked changes are really just suggested changes. To become permanent, they must be accepted. On the other hand, the original author may disagree with some of the tracked changes and choose to reject them.
Just Click the first red colored change and go to Review > Accept
Clicking on accept will show a menu box have some option as show in following picture
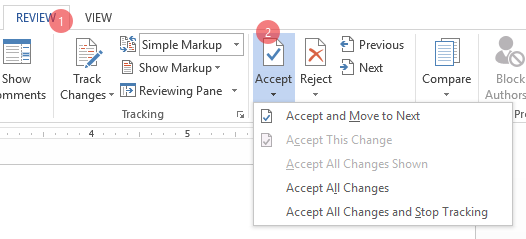
in Menu box click to the option to select your current change on which you clicked the first red change, MS Word will accept first change and turns red colour to back and will jump to next change, same like accept all or simple click the forth option to accept all changes. so this will help the read, writer and editor to suggest, accept or reject. after accepting the red mark will finish and the text will be as under
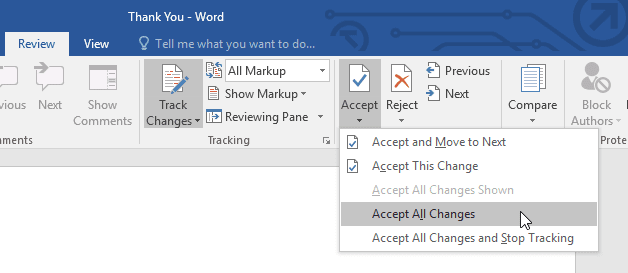
To accept all track changes
To accept all changes at once, click the Accept drop-down arrow, then select Accept All. If you no longer want to track your changes, you can select Accept All and Stop Tracking.
Reject the track changes will revert the changes to original text. how to reject them?
click on REVIEW > REJECT (a small menu box with some option will appear as was appeared in Accepting option) you can do as your choice.
Just by clicking on red line, you will see your changes in red colour like shown in following picture. in detail your can visit TRACK CHANGES VIEW OPTION below at the end of the post.
Watch all above working in the Video