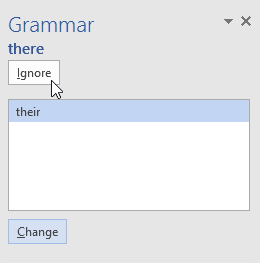
Worried about making mistakes when you type? Don't be. PowerPoint provides you with several proofing features—including the Spelling and Grammar tool—that can help you produce professional, error-free presentations.
To run a spell check:
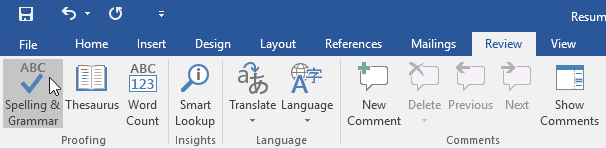
From the Review tab, click the Spelling command.

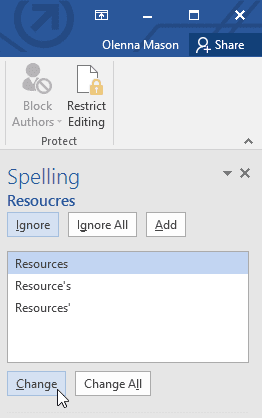
The Spelling pane will appear on the right. For each error in your presentation, PowerPoint will try to offer one or more suggestions. You can select a suggestion and click Change to correct the error.

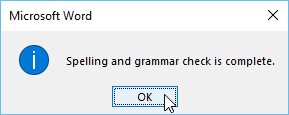
PowerPoint will move through each error until you have reviewed them all. After the last error has been reviewed, a dialog box will appear confirming that the spelling check is complete. Click OK.

If no suggestions are given, you can manually type the correct spelling on the slide.
Ignoring spelling "errors"
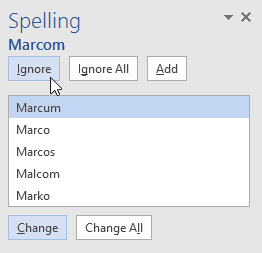
The spell check is not always correct. It may sometimes think a word is spelled incorrectly when it's not. This often happens with people's names and proper nouns, which may not be in the dictionary. If PowerPoint says something is an error, you can choose not to change it using one of three options:

Automatic spell check
By default, PowerPoint automatically checks your presentation for spelling errors, so you may not even need to run a separate check using the Spelling command. These errors are indicated by red wavy lines.
To use the automatic spell check feature:
Right-click the underlined word. A menu will appear.
Click the correct spelling from the list of suggestions.

The correction will appear in the presentation.
You can also choose to Ignore an underlined word or Add to Dictionary.
Modifying proofing options
PowerPoint allows you to modify the proofing options, giving you more control over how it reviews your text. For example, you can customize the automatic spell check to change the way PowerPoint marks spelling errors. You can also enable the grammar check option to help you find and correct contextual spelling errors (like their vs. they're).
To modify proofing options:
Click the File tab to access Backstage view.

Select Options. A dialog box will appear.

Select Proofing, then customize the options as needed. When you're finished, click OK.

Modifying settings in PowerPoint Options—including proofing—will affect any presentation you edit in PowerPoint, not just your current presentation.
Read More »
To run a spell check:
From the Review tab, click the Spelling command.
The Spelling pane will appear on the right. For each error in your presentation, PowerPoint will try to offer one or more suggestions. You can select a suggestion and click Change to correct the error.
PowerPoint will move through each error until you have reviewed them all. After the last error has been reviewed, a dialog box will appear confirming that the spelling check is complete. Click OK.
If no suggestions are given, you can manually type the correct spelling on the slide.
Ignoring spelling "errors"
The spell check is not always correct. It may sometimes think a word is spelled incorrectly when it's not. This often happens with people's names and proper nouns, which may not be in the dictionary. If PowerPoint says something is an error, you can choose not to change it using one of three options:
- Ignore: This will skip the word without changing it.
- Ignore All: This will skip the word without changing it, and it will also skip all other instances of the word in your presentation.
- Add: This adds the word to the dictionary so it will never come up as an error again. Make sure the word is spelled correctly before choosing this option.
Automatic spell check
By default, PowerPoint automatically checks your presentation for spelling errors, so you may not even need to run a separate check using the Spelling command. These errors are indicated by red wavy lines.
To use the automatic spell check feature:
Right-click the underlined word. A menu will appear.
Click the correct spelling from the list of suggestions.
The correction will appear in the presentation.
You can also choose to Ignore an underlined word or Add to Dictionary.
Modifying proofing options
PowerPoint allows you to modify the proofing options, giving you more control over how it reviews your text. For example, you can customize the automatic spell check to change the way PowerPoint marks spelling errors. You can also enable the grammar check option to help you find and correct contextual spelling errors (like their vs. they're).
To modify proofing options:
Click the File tab to access Backstage view.
Select Options. A dialog box will appear.
Select Proofing, then customize the options as needed. When you're finished, click OK.
Modifying settings in PowerPoint Options—including proofing—will affect any presentation you edit in PowerPoint, not just your current presentation.